- What are MotoPPF paint protective films?
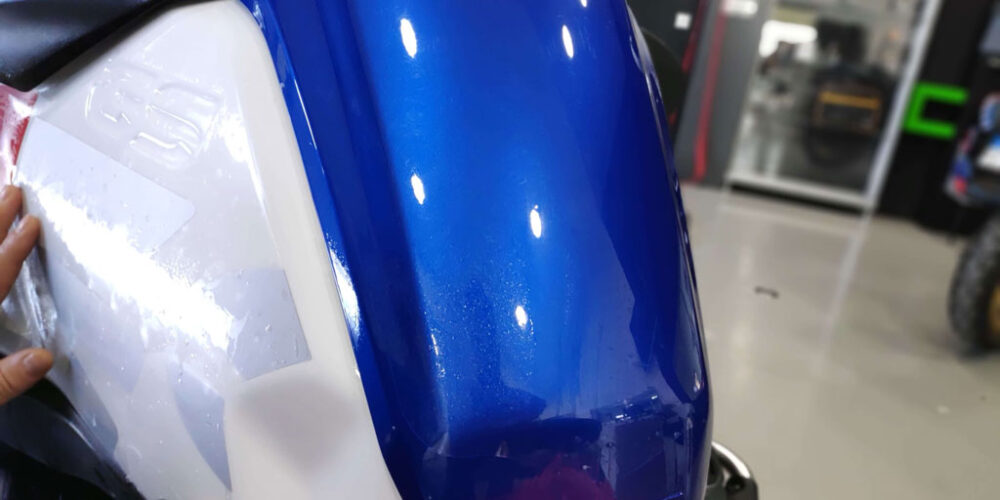
MotoPPF Paint protective films are clear transparent or black vinyl durable films applied to a motorcycle, panniers or top-box to protect panels from scratches, chips, UV rays, and other environmental damage. - How long do paint protective films last?
MotoPPF high quality paint protective films can last between 7 to 10 years or more, depending on environmental conditions, care and maintenance. - Can I apply the MotoPPF film myself, or should I hire a professional?
While some experienced DIY enthusiasts can apply MotoPPF themselves, we recommend hiring a professional for the best results. Professional installation ensures proper adhesion and avoids bubbles or misalignment. View MotoPPF Installation Guide. - How long does the application process take?
The application process typically takes 1 to 3 hours, depending on the complexity of the installation and the number of pieces being applied. - Will the film affect the appearance of my motorcycle?
Clear and Matte transparent films are available to match different surfaces and are virtually invisible once applied, preserving the original look of your motorcycle panniers and top-box. Black films, on the other hand, are specifically designed to enhance the aesthetic appeal. - Can the film be removed without damaging the paint?
Yes, MotoPPF can be safely removed without damaging the underlying surface, as long as the removal is done correctly. It’s best to have a professional handle the removal to ensure no damage occurs. - How do I maintain my paint protective film?
Maintenance is straightforward. Regular washing with mild soap and water is recommended. Avoid harsh chemicals and abrasive materials. You can also wax and polish the films. - Is MotoPPF paint protection film resistant to yellowing?
Yes, our high-quality paint protection films are designed to be resistant to yellowing. However, the level of resistance can vary depending on environmental conditions and the level of care and maintenance. It’s advisable to avoid prolonged exposure of the motorcycle to direct sunlight. - What happens if the film gets damaged?
Minor scratches on self-healing films may disappear with heat. For significant damage, the affected area can often have to be removed and replaced. - Can I apply the protective films on a surface with a ceramic treatment?
Yes, you can apply MotoPPF over a surface that has a ceramic coating. Can provide an additional layer of protection against scratches, chips, and environmental damage while preserving the benefits of the ceramic treatment. - Is paint protection film worth the investment?
Yes, MotoPPF provides long-term protection for your motorcycle, panniers and top-box, enhancing its resale value and keeping it looking new. The investment pays off in the form of reduced maintenance and repair costs.
“If you have any additional questions or need further information, feel free to reach out!”
• Soap solution or Window cleaner
• Alcohol 70%
• Clean microfiber cloths
• Squeegee or credit card
• Application Solution (100ml of Water mixed with 3-5 drops of Baby shampoo)
• Heat gun or hairdryer (optional)
- Prepare the Surface:
• Cleaning the surface: Use a soap solution or a window cleaner to clean the surface where the film will be applied. Remove any dirt and oils with Alcohol 70%.
• Spray the Surface: Spray the application solution on the. This allows for easier repositioning. - Position the Film:
• Spray the application solution: Spray the application solution on both sides of the film. This prevents scratches during the application process.
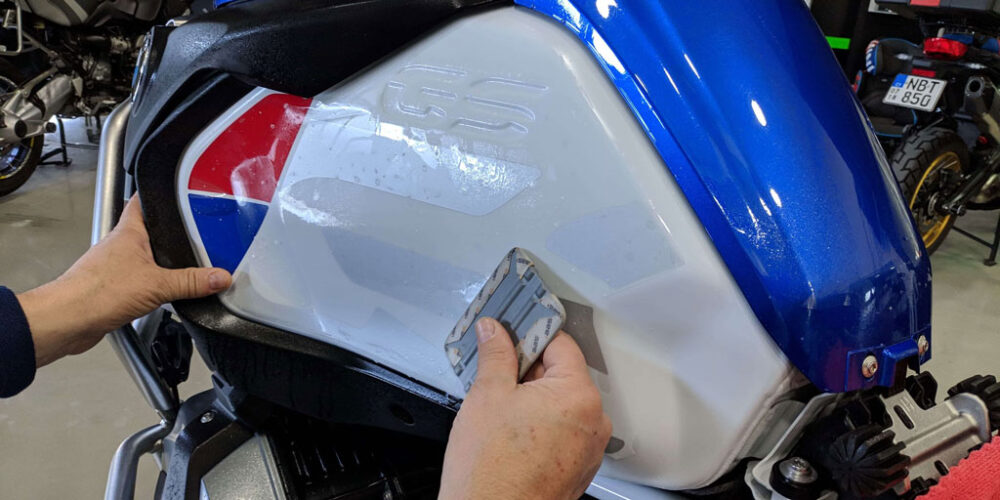
• Film Positioning: Carefully place the pre-cut film over the surface, ensuring it aligns properly. Adjust the positioning as necessary. - Apply the Film:
• Use a Squeegee: Gently use a squeegee to push out water and air trapped under the film. Be careful to avoid scratching the film.
• Use the Right Technique: Start from the center of the sticker and work your way outwards to push water and air bubbles out, rather than dragging the squeegee from one edge to another.
• Handling Bubbles: If you encounter water bubbles or not a smooth area, lift the film back in that specific area, spray it again, and repeat the application process. - Final Touches:
• Wipe Down: Use a soft cloth to gently wipe down the film, ensuring a smooth finish.
• Inspect the Installation: Check for air bubbles or edges lifting. If necessary, use the squeegee or a needle to release trapped air. - Allow to Dry:
• DryingTime: Allow the film to dry for at least 24-48 hours without exposing it to water or harsh conditions to ensure optimal adhesion.
- Work in a Clean Environment: Dust and debris can affect adhesion, so choose a clean workspace.
- Temperature Matters: Applying the film in a controlled environment around 15° C to 32°C (70°F to 90°F) is ideal for better adhesion.
- Patience is Key: Take your time during installation to avoid mistakes.
“With these instructions, you should be able to install your pre-cut paint protective film with ease. Happy riding”!
If you encounter issues during the films installation, here are some t tips to help you resolve them:
- Air Bubbles:
• Cause: Air trapped underneath the Film during application.
• Solution: Use a squeegee or credit card to push bubbles toward the edges.
For stubborn bubbles, gently poke with a razor blade to release air and smooth it down. - Misalignment:
• Cause: Films not positioned correctly before adhesion.
• Solution: If the films is not yet fully adhered, gently peel it back and reposition it.
Use a soapy water solution for easier repositioning if it’s still in the initial stages. - Poor Adhesion:
• Cause: Surface not cleaned properly or too much moisture.
• Solution: Clean the surface with isopropyl alcohol to remove grease and dust.
Ensure the surface is completely dry before application. - Sticker Wrinkling:
• Cause: Applying the sticker too quickly or without enough pressure.
• Solution: If wrinkles occur, carefully peel back the sticker and reapply, smoothing it out as you go.
Use a squeegee to apply even pressure. - Sticker Not Sticking:
• Cause: Surface is too cold, wet, or dirty.
• Solution: Ensure the area is within the recommended temperature range 15°C to 32°C. (60°F to 90°F).
Clean the surface thoroughly and let it dry completely before reapplying. - Damage to the Film:
• Cause: Using excessive force or improper tools during application or a damage squeegee.
• Solution: Handle stickers gently and use appropriate tools like a squeegee. If damaged, consider replacing the sticker. - Difficulty Removing Backing:
• Cause: Film may cause the backing to stick.
• Warm the Film Solution: Use a hairdryer on a low setting to slightly warm the sticker. This can help loosen the adhesive, making it easier to peel off the backing.
• Use a Blade Solution: If necessary, use a blade to carefully lift a corner of the sticker from the backing. Once a small area is lifted, you can continue to peel it off more easily. - Scratched Film Surface:
• Cause: Scratches and damage from the squeegee due to not spraying the solution on the topside of the film,
• Solution: Always spray the solution on the film’s surface before using a squeegee to prevent scratches. If scratches occur, using a heat gun on a low setting can help the scratches disappear by slightly softening the material
ADDITIONAL TIPS:
Practice Patience: Take your time during installation to avoid mistakes.
Temperature Check: Ensure the application area is warm and dry for optimal adhesion.
Seek Help: If needed, enlist a friend to assist with larger stickers for better alignment.
“If problems persist, don’t hesitate to reach out to customer support for further assistance”!
Motoppf is a proud sub-brand of Signature Custom Designs. As a sub-brand of Signature Custom Designs, MotoPPF benefits from the expertise and resources of the parent company. This relationship enhances the credibility and reliability of MotoPPF products, ensuring that customers receive the best in design and functionality.
Our high quality precision-cut films are designed for easy application, providing a robust layer of protection for your motorcycle, panniers and top-box while maintaining its stunning aesthetic. Engineered to withstand the challenges of the road, our films guard against scratches, chips, and other potential damage.
For more information about Signature Custom Designs, visit our official website (www.signaturecd.com) or contact our customer service for inquiries about specific services and offerings.
“Experience the difference with Motoppf and ride with confidence, knowing your motorcycle, panniers and top-box is protected and looks its best!”